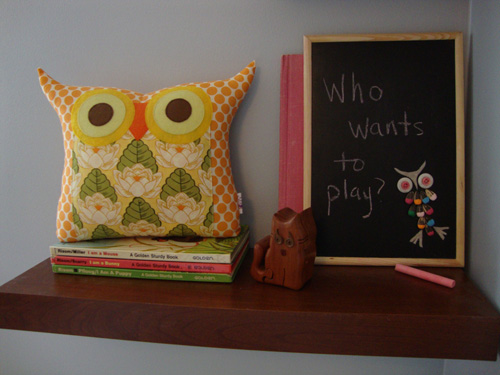
My name is Vanessa, and I write about children's books and book-inspired crafts on my blog Silly Eagle Books. After seeing a vintage owl necklace a few weeks ago, I was inspired to try out the technique to make an owl for my youngest daughter's nursery. (Since we are big owl fans, there are quite a few owls in it already!)
Here's what you need:
- small chalkboard (I found this one at the dollar store.)
- 10 sunflower seeds
- assorted paint colors
- felt
- two large buttons and two smaller buttons (for the eyes)
- hot glue gun
- scissors
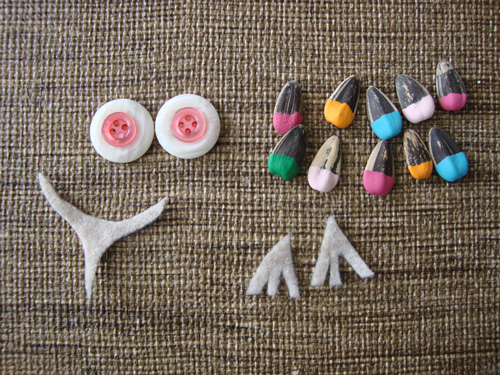
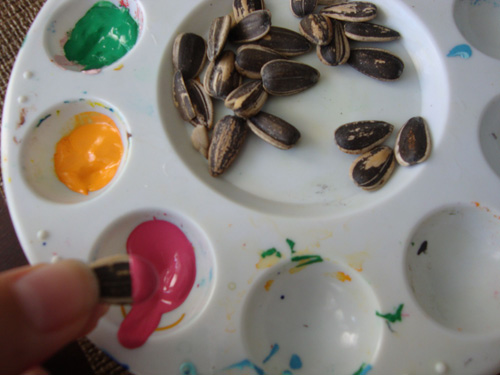
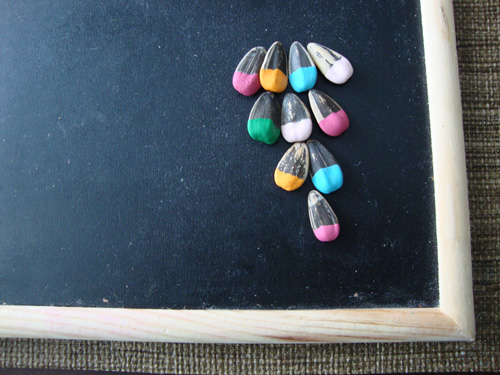
Begin by painting your sunflower seeds. I chose 5 different colors, but you could use as few or as many as you like. Instead of using a brush, I just dipped them into the paint.
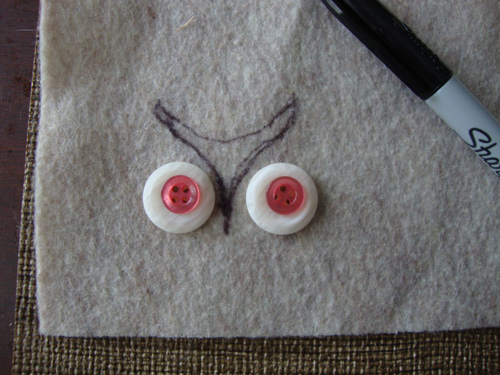
While you wait for them to dry, assemble your eyes by gluing one small button on top of a larger one. (You'll need them for the next step.)
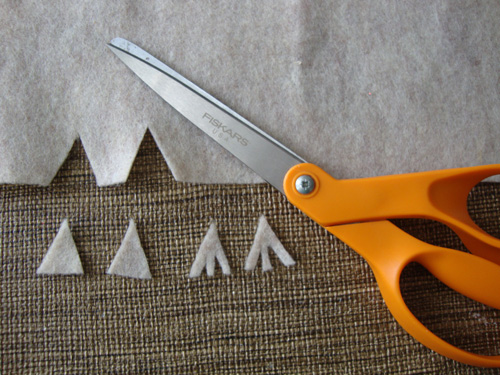
To cut out the face piece, place your button eyes on the felt. Using a permanent marker, sketch your shape onto the felt. Don't worry too much about the marks showing--just flip it over after it is cut out and use the
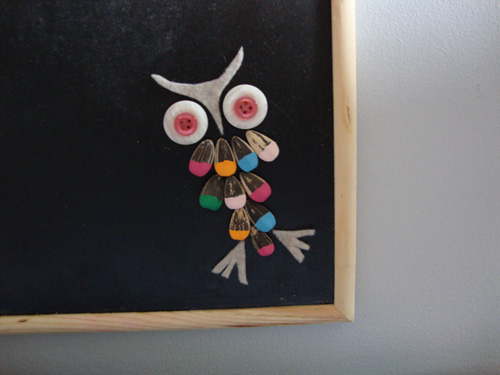
backside. To make the feet, cut triangles from the felt and then cut smaller triangles out to from three "toes".
Once your seeds are dry, you can begin hot gluing them onto your chalkboard. Line them up like this: 4 seeds, 3 seeds, 2 seeds, 1 seed. Glue on the eyes and felt pieces, and you are done!
Set it up in your child's room and you've got a perfect spot to leave special messages.
 (The phrase, "Who wants to play?" is from a favorite owl picture book of ours Sam and the Firefly by P.D. Eastman.)
Thanks again, Shivani for letting my guest post on your beautiful blog!
Thank you, Vanessa!





5 comments :
I LOOOOVE this!!! So darling!
How cute is this! I think I need to try this!
This is GREAT!! Love owls, love kids' books, love craft. Vanessa's blog looks like just the thing for me. ;o) Thanks for introducing her!!
great idea ! :)
Thanks again for letting me guest post! ;)
vanessa
Post a Comment